Showing posts with label Five for Friday Linky. Show all posts

Tuesday, December 8, 2020

Felt Christmas Tree

          Christmas Tree 
 
         Manipulative activities for youngsters is so very important.    I saw a stuffed felt Christmas tree on Pinterest and was intrigued.  It looked like something I could make for my grandchildren and nephews. 
             
           Now is a great time to get started on an activity for you little ones for the Christmas season. 

           I made a form from cardboard which is about two feet tall.  The large triangle shapes were glued together using a hot glue gun.   I used tacky glue to fasten the felt to the cardboard tree.    Then the tree form was filled with styro-foam packing peanuts to keep it light yet firm.       Finally, the felt bottom of the tree shape  was stitched in place to keep the tree together. 
           
          An old Advent calendar with little felt ornaments happened to be in my basement. These felt ornaments hung on to the felt of the tree much like a felt board.  The ornaments were the perfect size for little fingers and my tree.

           My granddaughter is 18 months old.   As you can see, she spend a lot of time arranging and rearranging the ornaments on her little tree. 


               We all need those quiet moments to reflect on the real meaning of Christmas, even the very small child.

  So start working on manipulatives for the young ones in your family.   You will not regret it.

           I have linked up with Doodle Bugs Teaching for the Five for Friday Weekly Linky Party.     Lots of great ideas for the new year and winter months.
  www.doodlebugsteaching.blogspot.com 


      Merry Christmas to all 
and to all 
a Good Night!


Please leave a comment if you have a minute. I'd love to hear from you.

Beti

Thursday, October 29, 2020

Day of the Dead

Silly Skeletons          
for 
Day of the Dead


          Each year my 5th graders have a Dia de los Muertos or Day of the Dead celebration as close to Nov. 1 and Nov. 2 as possible.    The students pick a person whose life they would like to celebrate.     The families talk about the aspect of their life and what the person looked like.      I have the students complete a research sheet to have all the details in one place. 

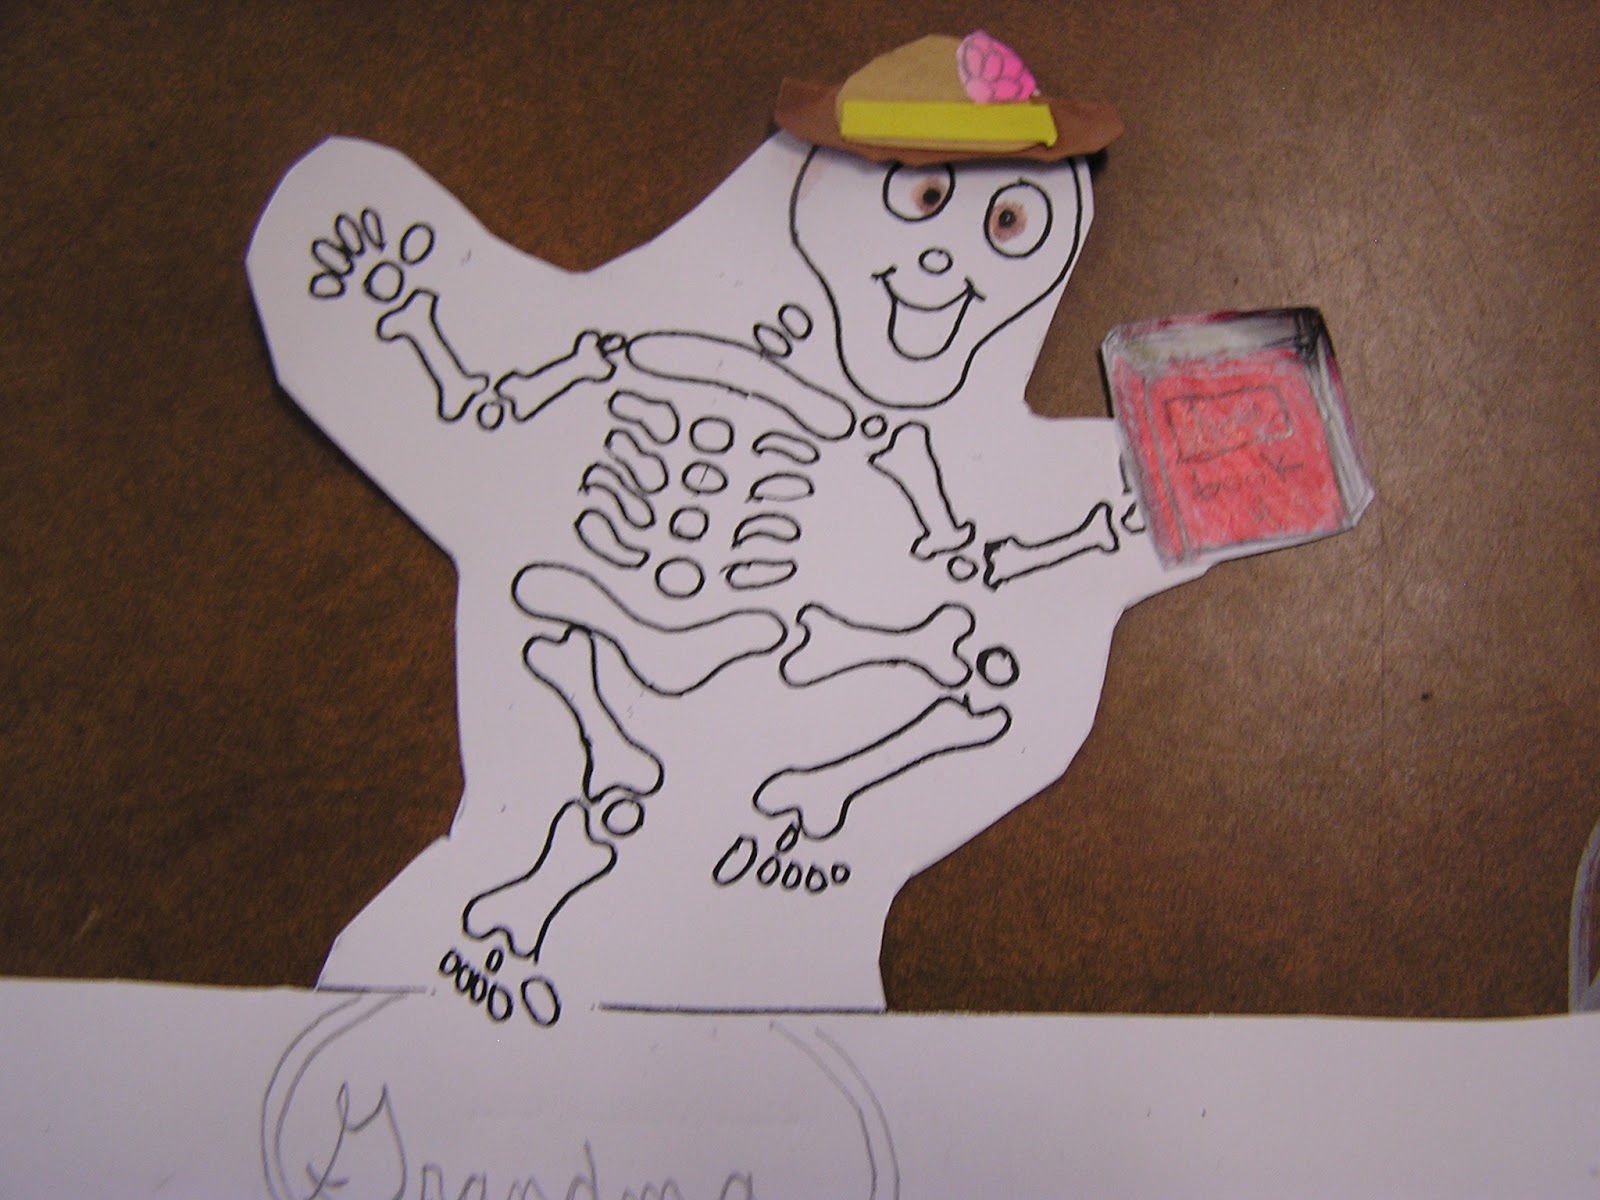
        We make little paper stand up skeletons for each person's life that we celebrate.    The instructions were to give the person a silly hat to wear and something that they liked, such as a favorite food or candy, in their hand.    You can see that the students had talked to their parents and knew about each person.


I am linking up with Doodle Bugs Teaching for the 
Five for Friday Linky Party -


     The students bring in a shoe box to make a small altar for the celebration.
A picture, candle, flower, and decorations are placed on a small piece of cloth used as an altar cloth. 

     Each child has a turn to speak about their person.     I encourage them to tell a funny story about this person.    This takes their minds off the fact that the person has passed on before us.

          This year I worked with the Art teacher to have the students make skeleton masks or sugar skulls.     In Mexico and Mexican neighborhoods in the United States, small and large skulls are made out of sugar for the Dia de los Muertos celebration.     It was a great lesson in symmetry.      Here are some examples of their sugar skulls.     The students used construction paper, crayons, and markers.


Please leave a message or comment if you get a chance.
Enjoy the beautiful day!

I have linked up with Teaching blog Addict for Freebie Friday.
Check out all the great ideas this week. 

www.teachingblogaddict.blogspot.com 

It's never too early to prepare for our Halloween activities.
Happy Halloween to all!

Beti 

Saturday, August 1, 2020

A little bird told me...

                       A  Little Bird


               Schools are a very important part of our society.  Catholic schools make a great impact on our Catholic children and families. That is why my fifth graders worked on this display.  St. Michael Catholic School in Livonia, Michigan has been a part of my life for many years. The students have made a huge impact on my life and I hope my teaching made as big of an impact on their lives as well.

    I have linked up with doodle bugs teaching for Five for Friday linky.
www.doodlebugsteaching.blogspot.com

       The fifth and second graders share the first floor of our school.   We were getting ready to celebrate Catholic Schools Week beginning Sunday.  A joint hallway display, with the 2nd and 5th graders, would be fun to do.  We had a bulletin board tree on the wall, so we had a good base for our project.


A little bird    told me....   
.....St. Michael Catholic School is GREAT!  Became the fifth grade theme.   Each 5th grader  got a little bird to design and write a comment about their impression of our school.


       We needed something underneath the tree.  So the second graders  colored and wrote a message on acorns. 
 A cute little squirrel says, " We are NUTS about St. Michael School!"  The 2nd graders thought the talking squirrel was so funny.


       I was impressed this week by how many children stopped to read the little messages written by our students.  We have an OPEN HOUSE for the public on Sunday and a spaghetti dinner and open house for our school families on Thursday.  Hopefully many more people will take some time to stop and read our children's thoughts about St. Michael Catholic School, too.

     Happy Catholic Schools Week! 

  It would be very nice to read your comments, so take a minutes and leave me a note.

Beti

Friday, July 3, 2020

Five Little Monkeys

Five Little Monkeys

            Five Little Monkeys is such a wonderful finger play for the young toddler.  These children are beginning to listen and repeat actions and words. They love rhyming sounds and silly songs.  What better song than "Five Little Monkeys Jumping on the Bed"?  
          
            I made these little finger puppets for my granddaughter. Riding in the car seat for a long trip can be very boring a for the child as well as the adults.  But I would rather hear Five Little Monkeys jumping on the bed than a child whining or crying unnecessarily.
           
           Some little distractions like this will definitely help with the sanity of the adults in your car. Spend a few quality minutes with your child instead of putting on a video. Remember that children benefit more from adult interaction than screen time. 

          As you can see, there is nothing fancy about these finger puppets, and you can whip these up quickly on a sewing machine with minimal sewing skills.


               These little monkeys needed a little bed to jump on. A little tin  Altoids box was the perfect size.  I cut a little blanket and pillow from some felt and glued it to the lid of the tin. Hopefully, you can use your imagination to see the little bed. The five little monkeys can sleep inside when not jumping on the bed.  This little tin can be popped into a purse or diaper bag.


              As you can tell from my blog,  I am a proponent of being with and doing as much as you can with your young child as you possibly can.  Our children are young for such a very short time.  They grow up so very fast.  Don't let another opportunity pass you by.  
         
       Today I linked up with Doodle Bugs Teaching for the Five for Friday linky.  Check out all the other blogs who have linked up, too.

www.doodlebugsteaching.blogspot.com

            Please leave a comment if you have a minute.  I'd love to read your thoughts.


Beti

Saturday, April 25, 2020

Puppies Quiet Book

Puppies!
  Puppies!
Puppies!
 

               On one of my excursions,   I was wandering around JoAnn Fabrics and saw a darling piece of flannel fabric with these cute little dogs.  They were so colorful with friendly facial expressions.  I could not resist buying a yard.  I knew it would be perfect for my next quiet book.  By purchasing fabric with cute graphics, I can spend less time constructing my quiet books. 


          Five little dogs of different colors would be great for color recognition and matching. 


         I cut around the dogs and zig zagged the matching colors back to back.  I was lucky enough that the dogs were facing in opposite directions so they could become two sided dogs.

          Each puppy needed a bed of the same color to sleep in.  Little pockets felt were sewn on for the dog beds.


       I added a light purple dog dish with water and food just in case the puppies get hungry!  As you can see the little yellow pup is having a snack from their dog food dish.  Yum!


      On the back cover a red dog house was added.  All the dogs can fit into the dog house.


       There is a snap at the top of the dog house so all the pups can fit in.


       A handle made from ribbon was added along the binding so the book can be easily carried by small hands.

     
           Today I have linked up with Doodle Bugs Teaching for the Five for Friday weekly Linky Party.  I enjoy reading Kacey's blog. She has so many great ideas for the classroom. Check it out!

www.doodlebugsteaching.blogspot.com

    
  Please leave a comment if you have an extra minute. I'd love to hear from you. Enjoy your day!

Beti

Wednesday, March 25, 2020

Color Matching Game

   Color Matching       

       Learning colors is a skill every child needs before they begin school.   Here is a very simple little game to make for your little one. Nothing fancy, but it works.   This is the least expensive children's activity that I ever made. Free! Free! Free!

      I went to the paint section of my local home improvement store to get paint chips.  There I looked for primary colors. Two of each, red, orangeyellow, green, blue, purple, pink, black , and brown were  the colors I choose.  The colors in the piture don't show up as they are to the eye.     ( You might want to get  sets of 3 or 4. Then if one gets lost there is no problem). 

        Different shades of colors may be used with older children. These children will be able to see the difference between lighter and darker colors. You could make a set with colors in the red, green, blue, etc.


      These paint chips were were trimmed down to fit into a small tin box. Altoids come in these great little tins.  They are the perfect size for little hands.  Mom can slip these into her purse or diaper bag for a quiet activity when needed. 

     With the left over trimmings, I made a rainbow arrangement of colors on the lid of the tin.  This will help all the colors get returned to their little tin when not in use. 


      An 18 to 24  month old can match the colors to begin with.  The names of the colors will also be mastered with this simple game. The color chips can also be used to match other objects such as pom pons, crayons, clothing, toys, etc.

     The great thing is that the whole thing is free and can be replaced at any time. 

Enjoy every moment with your young child.  They grow up so very fast!

     Today I have linked up with Doodle Bugs Teaching for the Five For Friday Linky.  Lots of great ideas are out there.  So hop on over and take a look.
 www.doodlebugsteaching.blogspot.com

 Please leave a comment if you have a spare minute.

Beti 

Tuesday, March 24, 2020

Easter Basket Envelope


          Now that we are working with our children at home, this is an easy project you can do at home with a white business envelope. 

         A simple business size envelope can easily become an Easter Basket envelope for your kids to make.


        I started with a standard business size envelope because local businesses had donated their old, out dated envelopes to our school.  Why buy new when you can reuse?  As you can see, I drew a dashed line about 3 inches from the left hand side of the envelope.  In this way the printed return address can be cut off  and discarded.


      That section was cut off. 

         Then I found the center of the remaining envelope and cut the flap into a triangle.

         A triangular section was cut out of the middle of the flap to create a handle for the basket.

          Finally, the left side of the envelope  is glued.  Now the decorating begins. As you can see, these were given to our 1st grade buddies.  So names were written on the front or back of the envelope to ensure delivery. As you can see we tucked our Easter cards into the completed envelope Easter baskets.


           A very easy  project for 5th graders to work on. If you are making these with younger children, an adult might have to do the cutting and gluing ahead of time to get the size correct. Then, have the kids do the decorating.
          
          These could also be used as place cards for your Easter dinner table. You might even fill each with a little Easter grass. Grandma and aunts will be impressed with their personalized name cards.  Let your children be creative and help decorate.


          Today I linked up with Doodle Bugs Teaching   
 five for FRIDAY weekly linky party.
www.doodlebugsteaching.blogspot.com 

          Please leave a comment.  I'd love read your thoughts and ideas.

            
   Enjoy Spring!
Beti