Showing posts with label Religion. Show all posts

Wednesday, November 18, 2020

Felt Nativity with Finger Puppets

Nativity Play Scene
and Finger Puppets


     It is never too early to start planning for Christmas!

      I decided to make felt Nativity scenes for my granddaughters to play with.   They needed something unbreakable and quiet to interact with for a quiet play activity.   The Bible story of Mary and Joseph coming to a simple stable for the birth of Jesus was the perfect setting for this felt play set.    Nothing too fancy, just the basics.


      Making the finger puppets a was  the beginning of the project.   Mary, Joseph, and Baby Jesus were the first to be made.    Two of each were stitched from small scraps of felt and embroidery floss.     Mary is about 3 1/4 inches tall and Joseph is about 3 3/4 inches. Each is about 1 3/4 inches wide.


       A small brown manger with hay has a pocket for the Baby Jesus to sleep peacefully. The manger is attached to a pocket in the stable.   With this pocket,  Mary and Joseph are able stand in front of or behind the manger to watch over their new born child.


     The Three Kings are different heights in the same range as Mary and Joseph.  They are each carrying a different shiny gift.   As I said before,  nothing fancy but durable for many hours of play by little ones.


        This Nativity scene would not be complete without a donkey.    Mary rode on  the donkey's back on the long journey to Bethlehem.   We all remember the "Little Drummer Boy" song during the Christmas holidays.      A little drummer boy finger puppet was added so the girls could sing a song when they play.


          A smiling angel is always around to protect and watch over the Christ Child.   You can see the angel standing behind the manger.    The angel is able to watch over the Holy Family in a small pocket near the star on the top of the stable.    The star will guide the Three Kings or Wise men to see the New Born King.


        The play scene has plastic canvas in between the inside and outside.   This plastic sheet gives the felt strength and helps the Nativity play scene to stand up on its own.   Felt pockets are secured to the insides of each panel.    The pockets are designed to hold the finger puppets in place when the scene is closed after play. 


          As you can see, the " tan colored ground" folds up into the play scene.    The two sides fold in and are secured with velcro.    A handle made of green grow grain ribbon was stitched on so that this play set can be easily carried by a young child.

           I hope this Nativity Play Scene will give you the incentive to make something like this for a young child that you know and love. 
    
Happy Sewing!

Beti

Thursday, October 29, 2020

Day of the Dead

Silly Skeletons          
for 
Day of the Dead


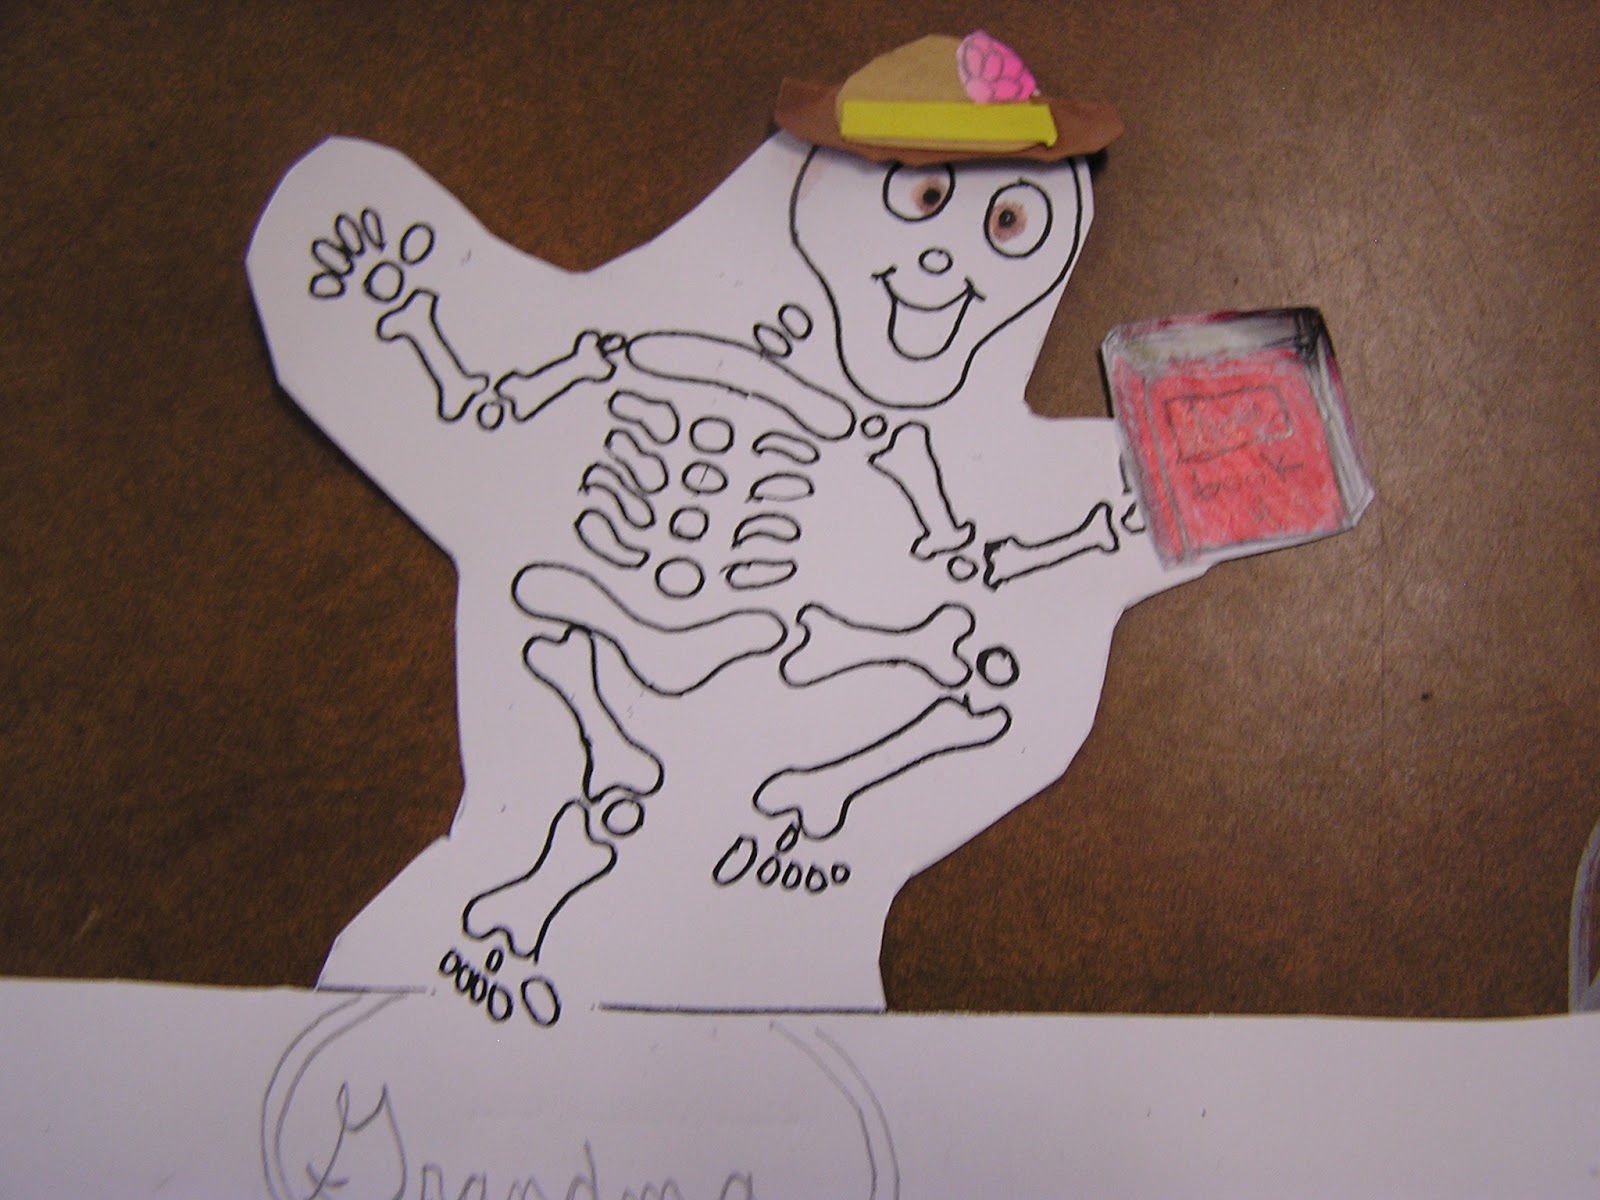
          Each year my 5th graders have a Dia de los Muertos or Day of the Dead celebration as close to Nov. 1 and Nov. 2 as possible.    The students pick a person whose life they would like to celebrate.     The families talk about the aspect of their life and what the person looked like.      I have the students complete a research sheet to have all the details in one place. 

        We make little paper stand up skeletons for each person's life that we celebrate.    The instructions were to give the person a silly hat to wear and something that they liked, such as a favorite food or candy, in their hand.    You can see that the students had talked to their parents and knew about each person.


I am linking up with Doodle Bugs Teaching for the 
Five for Friday Linky Party -


     The students bring in a shoe box to make a small altar for the celebration.
A picture, candle, flower, and decorations are placed on a small piece of cloth used as an altar cloth. 

     Each child has a turn to speak about their person.     I encourage them to tell a funny story about this person.    This takes their minds off the fact that the person has passed on before us.

          This year I worked with the Art teacher to have the students make skeleton masks or sugar skulls.     In Mexico and Mexican neighborhoods in the United States, small and large skulls are made out of sugar for the Dia de los Muertos celebration.     It was a great lesson in symmetry.      Here are some examples of their sugar skulls.     The students used construction paper, crayons, and markers.


Please leave a message or comment if you get a chance.
Enjoy the beautiful day!

I have linked up with Teaching blog Addict for Freebie Friday.
Check out all the great ideas this week. 

www.teachingblogaddict.blogspot.com 

It's never too early to prepare for our Halloween activities.
Happy Halloween to all!

Beti 

Thursday, October 8, 2020

Learning the Apostles Creed with a puzzle

 Learning with  Puzzles ...
      
     My 5th graders are learning the Apostles Creed in Religion class.
In order to do this is class, I printed the prayer, dividing the phrases into
11 boxes.  Each child wrote their initials and class number in each of the 11
rectangles. Then we flipped the paper over.  They held up the piece of paper
and realized that they could see the boxes through the paper.  Each box was
numbered on the reverse side of the paper.  The students cut the paper into
11 strips, each numbered on the back.  This was the way they could check to
if the phrases of the prayer were in the correct order.

        Now to play the match game. All the strips were placed on the desk in
random order.  Each child stands up and pushes in their chair.( I like to have the students stand to work on this activity in order to make it different from other class activities. They get very engaged in the activity when standing. )  Everyone begins  to put the strips in the correct order.


This young student has completed the puzzle strips and is raising their hand.  The right arm is blurry because of movement.


          When the words of the prayer are in the correct order the student raises their hand  high into the air.  The student looks around the room to see another student with their hand up.


       Eye contact is made.  The kids point to each other in order to make sure they have made a contact. They nod their heads in agreement.  Finally, each child mixes up their strips, and they switch locations.  The process begins again.
     
 My students really like doing this in order to learn the Apostles Creed. They get to move around the room.  Oh, I forgot to tell you that all this is DONE IN COMPLETE SILENCE!  It is AWESOME to see my students working so intently.
   
       I will be able to use this activity if the kids need to memorize the Preamble of the Constitution or the final part of Patrick Henry's speech.

Beti

Thursday, September 3, 2020

Martin Luther and the Reformation

Martin Luther 

       I taught a Social Studies lesson on Martin Luther, the Reformation, and the Protestant Religion.  I have had real success with interactive notebook pages this year with my students. So, this is my attempt to explain the concept.

      The homework tonight was to teach your parents about Martin Luther, the Reformation, and the Protestant Religion.  
      
       These are the church doors... When the paper is folded the students were instructed to write 15 in the left side door near the edge of the door and 17 on the right side door near the edge of the paper.  When the doors are closed you can read the date 1517.  In the same way, the words Catholic and Church are written.  The door handles were added next.  Finally, the sheet with 95 reasons that Martin Luther was dissatisfied with the Catholic Church are mailed to the door.

      
        This is the inside with the picture of Martin Luther. Sorry for the blurry picture.


The center section where the students had to fill in information.


        This is my model of the outside flaps which became the doors.  After  I drew the nail on the paper with the 95 reasons, of course I hammered  on my desk, just for the effect.  The boys loved it and pounded on their desks, too.
   
     Here you can see the finished product glued onto loose leaf with the title included.


       The students' homework is to used this Flip chart to explain to their parents who Martin Luther was and what he did. If a child can explain a concept to an adult or another student they have the knowledge of the material and information. 😃  

          Flip Charts are a fun way for the students to learn information with a hands on project.


Beti

Thursday, April 30, 2020

Puppets

 Puppets, Puppets, Puppets!

            I have made puppets with my 5th graders for at least the last 15 years. It was a year long project starting with the collecting of the light bulbs and culminating with puppets shows for  parents and doing traveling puppet shows for other the students in our school. 
   
             I retired last June.  My friend, Cindy, switched grades and took over teaching my 5th grade classes. Cindy wanted to continue making puppets this year if I would come in and walk her through the  process of paper mache', painting the faces, gluing on the hair, beards, and mustaches, designing and making the clothing.   I had a great time working with the kiddos and being able to leave the mess (only kidding) behind. 

          When working with the paper mache', I found that most of the students had never used the paper mache' paste or art paste.  Many of the kids would be upset the first time they touched it. The paste feels quite slimy and some children didin't like that sensation on their hands.  So, I always try to make a joke of it and say it feels like slime or snot.  Of course, all the kids make a awful noise but are intrigued. I tell them to only put two fingers in the paste at first. It gets most of the kids over that first touch and things go smoothly after that.
  
        After we have completed the first two coats of paper mache', the kids want to wash their hands. I tell them to rinse off their hands with water only.  If you wash your hands with soap you will make an incredible amount of bubbles. One of the boys came back after cleaning his hands.  He stated that his hands felt like "Grandma Hands", meaning they were so very soft.  I had to laugh.

        Here are some of the finished products.  I just love them.  Every year the students manage to amaze me with their creations.


Doesn't she have the most precious face?


His necklace adds a sparkle to his face.


His eyes and eyebrows intrigue me!


The green dress brings out the color of her eyes.

                    I love the expressions on their little faces. Everyone is different with hair and eye color, beards, eyelashes, and smiles.


                Just in case you were wondering about the style of clothing , the puppets represent people from the Bible. The women are wearing a veil, crown, or some kind of head covering.   Some of the Bible stories presented as puppet shows were Noah's Ark, David's Giant Faith, Jonah and the Whale, Moses and Water from the Rock, Jacob and Esau, and  The Birth of Moses to name a few.

             Making these darlings is a long process, but very rewarding for the students in the end. I do hope Cindy will continue to have the kids make puppets in the future.


 I have  linked up with 4th Grade Frolics. Please stop by to see her new classroom for the fall.
www.4thgradefrolics.blogspot.com
    

 Please leave a comment if you have a spare minute. I'd love to read your thoughts.


Beti

Thursday, March 26, 2020

Holy Week Cube

          Holy Week

     The Felician Sisters helped start St. Michael Catholic School more than 75 years ago.  I am pleased to say that I  have taught at St. Mikes for 25 years and worked with these wonderful dedicated women. 
           When I first started teaching, two wonderful Felician sisters, Sister Helen and Sister Therese, directed  Religious Education for the school and parish.  They taught workshops for the teachers after school so we could receive our religious certification. I was given many handouts to use in my classes during these workshops.
               This Holy Week cube is a wonderful visual reminder for my students as they journey into the Holiest Week for Christians. 


   The six sided cube has line drawings of the crucified Christ, dice, wheat, bread, coins, and palms to signify important aspects of Holy Week.  Once colored and cut out,  it is folded and glued together to form a cube.


       Here are some samples of my student's cubes this year.


         I do hope that someone will be able to use this Holy Week Cube with their students. I know that sisters Helen and Therese would be so pleased that their 
workshop handout was being used with a new generation of Catholic children during Holy Week to remember the Passion.

     Remember the true meaning of Easter.

Beti 

Monday, March 16, 2020

Cracked Egg Cards and Envelope Baskets


Cracked Eggs  

  I found this cute cracked egg design to make an Easter card at 
http://www.sundayschoolkids.com/activities-lent-easter/1-cracked-egg-instructions.htm 


        My 5th graders made these cards for their 11st grade buddies.  They turned out quite cute.


http://www.sundayschoolkids.com/activities-lent-easter/1-cracked-egg-instructions.htm


     The directions were quite a challenge for some of the students.  First you had to read the directions from the bottom up. That was confusing for some.


The directions to reverse fold also stumped a group to children.  But the end result was very cute as you can see. 


    Envelopes came in handy to make a basket envelope for the Easter egg card.


          First, we took a legal size envelope and cut off the end with the return address. ( Our school gets donations, boxes of old recycle envelopes from local businesses).  


         Next, the remaining part was folded in half. The top flap was cut to match the curve.  Then a cut was made along the fold and following the curve to make a handle.  


        Finally, the open side of the "basket" was glued and decorated.  


       The cracked egg card fits nicely into the basket and ready for delivery. 


  Check out the Forever in 5th Grade Linky, SHOW and TELL.
www.foreverinfifthgrade.blogspot.com


 A joyous Easter to all!


Please leave a comment if you have the time. 

Beti