Showing posts with label Art Project. Show all posts

Wednesday, December 16, 2020

Baby Candy Canes

    First Candy Canes
 
This one was made by my son when he was about 2 and a half years old.


           Christmas is a perfect time to get out the finger paints for you child or children.  Tag board or a file file is a perfect weight paper to work on.   The file folder stays in place and does not wrinkle or bend with the movement of little fingers.


        I drew the outline of  three candy canes on a file folder. Then the  red finger paint came out!!! Oh what excitement!! The squishy feeling of paint on your fingers.  The paint is applied to the paper with such zeal! 

         After the paint was dry, I cut the candy cane shapes out.   Of course the names of the artist and the year were written on the back to look into the past many years from now.

       This is my 18 month old granddaughter's candy cane for this year.


      My daughter made this candy cane below, more than 30 years ago.  She was about 8 months old at the time.   It looks as good as new!  These fans canes are always hung on my tree with care just like the fragile glass ornaments.   They are so precious to me!

   
          These precious candy canes will have a special place on my tree every year.

     Christmas tree ornament don't have to be made of finest silver, gold, or crystal to be cherished.  

Hoping everyone has a very Merry Christmas! 

Beti

Tuesday, November 17, 2020

Christmas Wreath


            Since Christmas is right around the corner, a hand print wreath would be a good project on a cold day for an 18 month old.    As you can see, some green hand prints are distinguishable, but  most are more of sliding hands across the paper.      We worked on those little red berries for a finishing touch.

        I did not want it to be perfect because this is the art work of a toddler.
When she gets to preschool, kindergarten, or 1st grade her teacher can tell her
to make beautiful hand prints.    Good luck with that!     I didn't want to upset my granddaughter. 

        To make this look more like a wreath, I did cutting.

       The bow hand prints were left over from the candy canes we worked on the day before.     "Waste not, want not" when working with a toddler or any child on an art project.

       This wreath is being sent overseas to her DADA who has been deployed.  So make sure your package gets sent out early enough to get to its destination in time.
I hope this wreath will  make his time away a little easier.

            Merry Christmas 
 to all our service men and women who are spending the holidays apart from their families.


Beti
 

Saturday, October 24, 2020

Popsicle Stick and Felt Ornaments

   Popsicle Stick Ornaments!  An easy creative project for school or home.
            It's never to early to plan projects!

         In the past years I tried popsicle stick ornaments with my 5th graders. I could have used tongue depressors, but all I had on hand were popsicle sticks.  They glued the sticks together on sheets of wax paper. Each child was given five pieces of felt, red black, green, brown and white to start with. Mind you everyone asked for more felt as the creativity went into high gear.  I always cut the felt into pieces about 2 or 3 inches square.  That way they don't waste felt.  The googlily eyes always add that something special.  I showed some inspiration pictures that I found on Pinterest and the kids started designing very quickly. Students gained inspiration from their peers. Each one was unique in their own charming way.


   The facial expressions are priceless!
Isn't this the cutest little Santa?


              Instead of painting, the students used their markers.    In the way we didn't have to wait for the paint to dry before they hey started glueing the felt pieces onto  to wooden pieces.      I' m sure the ornaments would have looked better, but we only had a short period of time to complete this project. 


    Some were completely covered in felt, as you can see with this snowman,  while others just had tiny felt pieces for accents.


Little pieces of thread were added so these little darlings could hang on the tree.


         Each one has the date on the back. Hopefully, the kids can look back in years to come and have fond memories of making each one when they were in 5th grade.


   I guess I'm biased, but I think they are very cute!

Today I'm linking up with 
Stephanie at Forever in Fifth for 
Show and Tell Tuesday
Merry Christmas everyone!

 www.foreverinfifthgrade.blogspot.com

 Merry Christmas  and enjoy decorating your tree!

Beti

Thursday, September 24, 2020

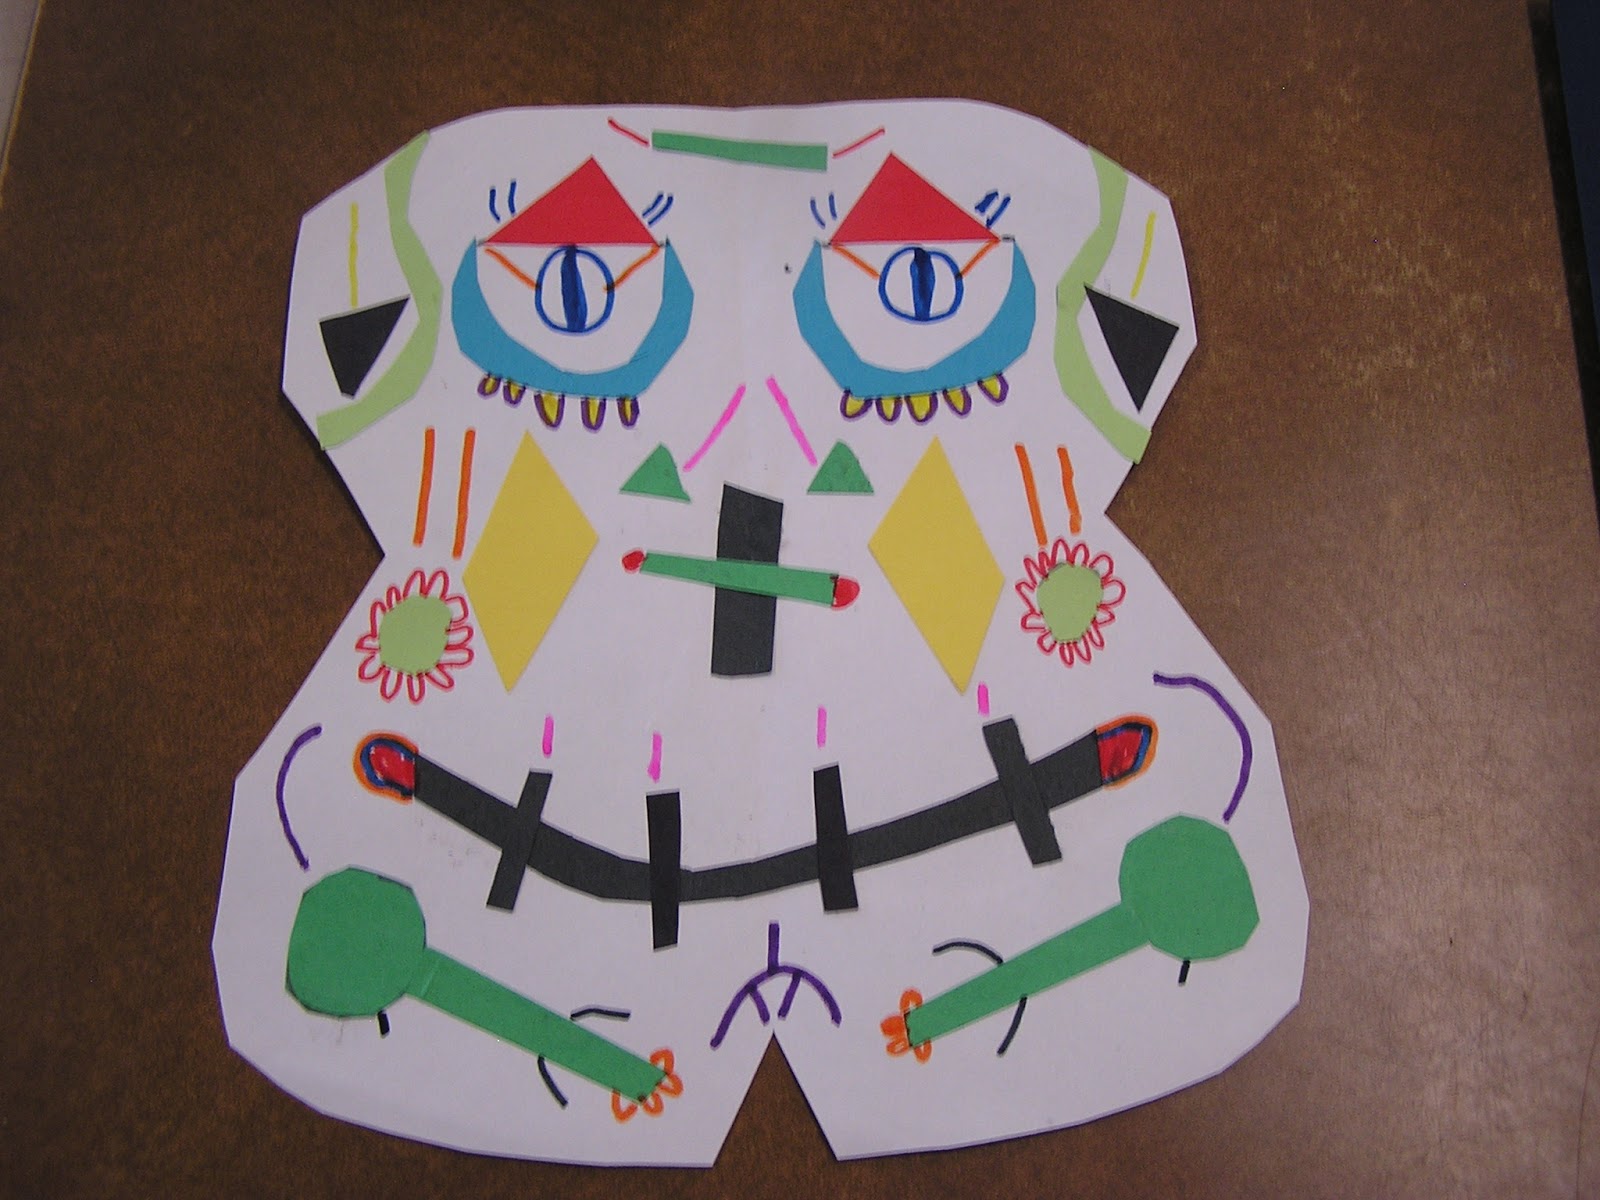
Symmetry Skeletons

        Symmetry Skeletons     

    Halloween lends itself to a lesson on symmetry very well.  The lessons of symmetry have been in Math books from 1st grade.  I use this with my 5th graders. So a short bit of review may be necessary for some vocabulary terms. When you show the kiddos that they are going to be designing skeleton heads, they are ready and willing to work.

 Today I am linking up with Forever in Fifth Grade for the October Show and Tell Tuesday.
www.foreverinfifthgrade.blogspot.com


    First folding the paper is necessary to form the head shape.  The fold can then be used as the mid line for the correct placement of the facial features and extra designs. Markers, crayons, and some scrap paper and glue is all the students need to complete this project.
 

      This lesson can be related to Dia de Los Muertos   or  Day of the Dead which occurs on November 1st and 2nd. 


 As you can see, each student has their own impression of how each skeleton should look.


I hope you have a wonderful 
Halloween  this year.


Please leave a comment. I'd love to hear from you.

Beti

Sunday, June 28, 2020

Indians of the Pacific Northwest

  
Cedar 
Dugout 
Canoes

          Native American people is a unit of study for my 5th graders.  The topic of the Indians of the Pacific Northwest Coast is quite interesting for my students.  We discussed location, climate, natural resources, transportation, and crafts.
     To bring the construction and designing  of a cedar dugout canoe to life I used paper and colored pencils.  The construction of a cedar dugout canoe was very interesting o to my students. I found it a student has an object in hand, they learned the information easily.  This is the inspiration for the student work.


      For the children to get a hands on feel for the dugout, we made folded paper dugouts. To bring in the concept of Symmetry,  we discussed that both sides of the dugout canoe were the same. While the paper was flat and uncut, the students needed to plan their design and colors to be used. The back side of the paper was also colored brown to indicate the inside of the canoe was wood. finally, the dugout canoe was cut from the paper, folded on the dotted lines, and glued together on the paper tabs found on the pattern.  As you can see they were very cool.


      My students drew illustrations of their concept of a village belonging to the Chinook tribe. Each child could refer back to their book, powerpoint presentation, as well as the illustrations in the room for reference. I tell my students, "A picture is worth a thousand words".  For some children, they need a picture in their head to tell a story or remember information.  ( I was one of those kids, and am still like that today.)  This is why I have my 5th graders do so many hands on related projects.


    Have a great day!

Beti

Tuesday, June 2, 2020

1400's Ships

      1400's  Ships
 
       I needed to introduce my new unit on European explorers.   Student illustrations of these sailing ships  seemed like a good idea.   I printed up a worksheet with the following instructions.
   
Draw and color an illustration of a sailing ship used in the 1400's when sailors crossed the ocean. 


      I love how hard my 5th graders worked on their illustrations of these wonderful ships. By having the students draw their own illustration instead of just coloring a picture, they are able grasp the image of caravel, a small highly maneuverable sailing ship developed in the 1500's by the Portuguese.  This will be a great springboard in learning about such explorers as Columbus, Hudson, Cortes, Ponce de Leon, Cartier, and John Cabot.

    My kids always enjoy learning about European explorers and the stories of their lives.  I bring out all the explorer books from the school library and the classroom library.  

    Please leave a comment if you get a spare moment.  I love reading your emails.
   Today I linked up with Doodle Bugs Teaching for the November linky.
www.doodlebugsteaching.blogspot.com
Beti
    

Thursday, April 30, 2020

Puppets

 Puppets, Puppets, Puppets!

            I have made puppets with my 5th graders for at least the last 15 years. It was a year long project starting with the collecting of the light bulbs and culminating with puppets shows for  parents and doing traveling puppet shows for other the students in our school. 
   
             I retired last June.  My friend, Cindy, switched grades and took over teaching my 5th grade classes. Cindy wanted to continue making puppets this year if I would come in and walk her through the  process of paper mache', painting the faces, gluing on the hair, beards, and mustaches, designing and making the clothing.   I had a great time working with the kiddos and being able to leave the mess (only kidding) behind. 

          When working with the paper mache', I found that most of the students had never used the paper mache' paste or art paste.  Many of the kids would be upset the first time they touched it. The paste feels quite slimy and some children didin't like that sensation on their hands.  So, I always try to make a joke of it and say it feels like slime or snot.  Of course, all the kids make a awful noise but are intrigued. I tell them to only put two fingers in the paste at first. It gets most of the kids over that first touch and things go smoothly after that.
  
        After we have completed the first two coats of paper mache', the kids want to wash their hands. I tell them to rinse off their hands with water only.  If you wash your hands with soap you will make an incredible amount of bubbles. One of the boys came back after cleaning his hands.  He stated that his hands felt like "Grandma Hands", meaning they were so very soft.  I had to laugh.

        Here are some of the finished products.  I just love them.  Every year the students manage to amaze me with their creations.


Doesn't she have the most precious face?


His necklace adds a sparkle to his face.


His eyes and eyebrows intrigue me!


The green dress brings out the color of her eyes.

                    I love the expressions on their little faces. Everyone is different with hair and eye color, beards, eyelashes, and smiles.


                Just in case you were wondering about the style of clothing , the puppets represent people from the Bible. The women are wearing a veil, crown, or some kind of head covering.   Some of the Bible stories presented as puppet shows were Noah's Ark, David's Giant Faith, Jonah and the Whale, Moses and Water from the Rock, Jacob and Esau, and  The Birth of Moses to name a few.

             Making these darlings is a long process, but very rewarding for the students in the end. I do hope Cindy will continue to have the kids make puppets in the future.


 I have  linked up with 4th Grade Frolics. Please stop by to see her new classroom for the fall.
www.4thgradefrolics.blogspot.com
    

 Please leave a comment if you have a spare minute. I'd love to read your thoughts.


Beti

Friday, August 25, 2017

Helpers

 Kids love to help in and around the classroom.   

  Most teachers have a helper chart of some kind in their room.
 I have my kids made little people to resemble themselves.

Today I am linking up with Doodle Bugs Teaching and the Five for Friday Linky Party! Lots of great ideas all around.
www.doodlebugsteaching.blogspot.com 


       The tag at the bottom is for the student's name.

Here are a few examples of this year's helpers.  After the designs are completed, I laminate the helpers and cut them out.


         I am so pleased that the children take so much time and add details to the characterization of themselves. At the beginning of the year we are just getting to know our students. By observing student artwork, the teacher can learn so much about their students. Our students wear a uniform to school, so they really enjoy wearing everyday clothes to school on special days.

        Here are some of the helper tags.  The students attach their helper person near the tag of the job they have chosen. 


    What type of Helper Chart do you have in our room?

     Please leave a comment.  I always enjoy hearing your thoughts and ideas.

Have a great  2016 - 2017 school year!

Beti