Showing posts with label Halloween. Show all posts

Monday, October 19, 2020

Halloween Costumes

       
       Today I am linking up with Doodle Bugs Teaching for a Five for Friday linky party!

www.doodlebugsteaching.blogspot.com

      All kids, big and little, love dressing up for Halloween.  Parents love to dress their little ones, including dogs and cats for this great event. This year I made three costumes.  Elmo, Oscar the Grouch, and a Baby Bunny.
   

       Oscar the Grouch was made for Barkley, a little Yorkie. As you can see this is not Barkley, but a stuffed dog.  Barkley lives in another state, so I needed a mannequin when working on the Oscar costume.   The Oscar is the size and shape of a hand puppet.   The head, body, and garbage can are stuffed.   The arms and hands were left flat.   This way the arms can flip around when the dog is walking or running. 


     I made a felt dog coat and then attached Oscar so Oscar in his garbage can would be riding on the dog's back.


   Elmo was made from a red onesie with a red toule face and shirt. Felt was used for the facial features.
 I hope Elmo and Oscar made a good team Trick or Treating!


      The Baby Bunny was made from a pink long sleeve shirt and a scooter skirt.
I purchased all the clothing from the sale rack. 


     And here is the back with a little puffy tail. 


Happy Halloween to All!
 Please leave a comment if you have time. I'd love to hear from you.

Beti 

Wednesday, September 30, 2020

Baby Bunny Costume

          A Baby Bunny costume is my latest creation.


        I like to make costumes that are easy for a child to wear and can be worn after Halloween.  Kids like to play dress up and wear favorite outfits. I hope this one will be enjoyed by my granddaughter.

        I saw a pink long sleeve shirt and this cute little scooter skirt on the sale rack, of course. It did have an applique of an elephant holding a balloon with his trunk. This needed to be covered with the bunny applique. That is why the shoulders were added beneath the face. If you look closely, you can see a faint dark spot under the cheek of the bunny.  I used felt for all of the details to make the face.  The eyebrows, mouth, and whiskers were stitched with black and brown embroidery floss.
  
      The last touch was to make a puffy bunny tail. I know the colors are not an exact match, but buying from the sale rack you have to take what you can get. If it is cold she can wear white tights or leggings to keep her little legs warm and cozy. A lot of times little ones don't like to wear anything one their head. I know she has a head band with bunny ears from last Easter. Maybe the head band will be added to the costume.

          Please leave a comment if you have the time. I'd love to hear from you.

  Happy Halloween to All! 

Beti

Sunday, September 27, 2020

ELMO for Halloween

                My granddaughter loves Elmo.  So I needed to make her an Elmo costume for Halloween.  I went out and found a bright red onesie with a 4th of July theme stitched on the front. Would you believe I found it for $1.20 on the clearance rack!  It was impossible to find a plain red onesie at any local store. Everything has some sort of cute decoration.
 So I improvised.....


         I sewed a piece of red felt with a zig zag stitch onto the onesie. Then the white eyes with black pupils were stitched on. Next, the big orange nose and the smiling black mouth.

         I purchased 3 yards of red tulle to complete the costume.

       A two layered, four inch strip was cut off of the the entire 3 yard length. Now I had two pieces, 4 inches by 3 yards. This was folded in half, lengthwise, to make a 2 inch piece with four layers. I ran a basting stitch the length of the material  1/2 inch from the edge.  The thread was pulled to make the ruffle around Elmo's face. * The ruffle was then sewed in place by hand.  I had to made sure that it was not sewed too tightly or the onesie would pucker. 

     The remaining piece of material was folded in half fold to edge. This piece was about 12 inches by 3 yards. Again, a basting stitch was sewn about a half an inch from the folded edge. The thread was pulled to gather and make a large ruffle for the skirt.

    * Actually, the skirt was sewn onto the onesie first and then the face ruffle was added after so the face ruffle would overlap the skirt ruffle. 

        A child could wear this with red tights, leggings, or pants if they needed to cover their legs in case of cold weather.  You could leave off the skirt if it is intended for a boy's costume.

     This was so much fun to make. I looked a a lot of Elmo pictures on line to get inspired.

      Happy Halloween to All!

Please leave a comment if you have the time.  I'd love to hear from you.
Beti 

Thursday, September 24, 2020

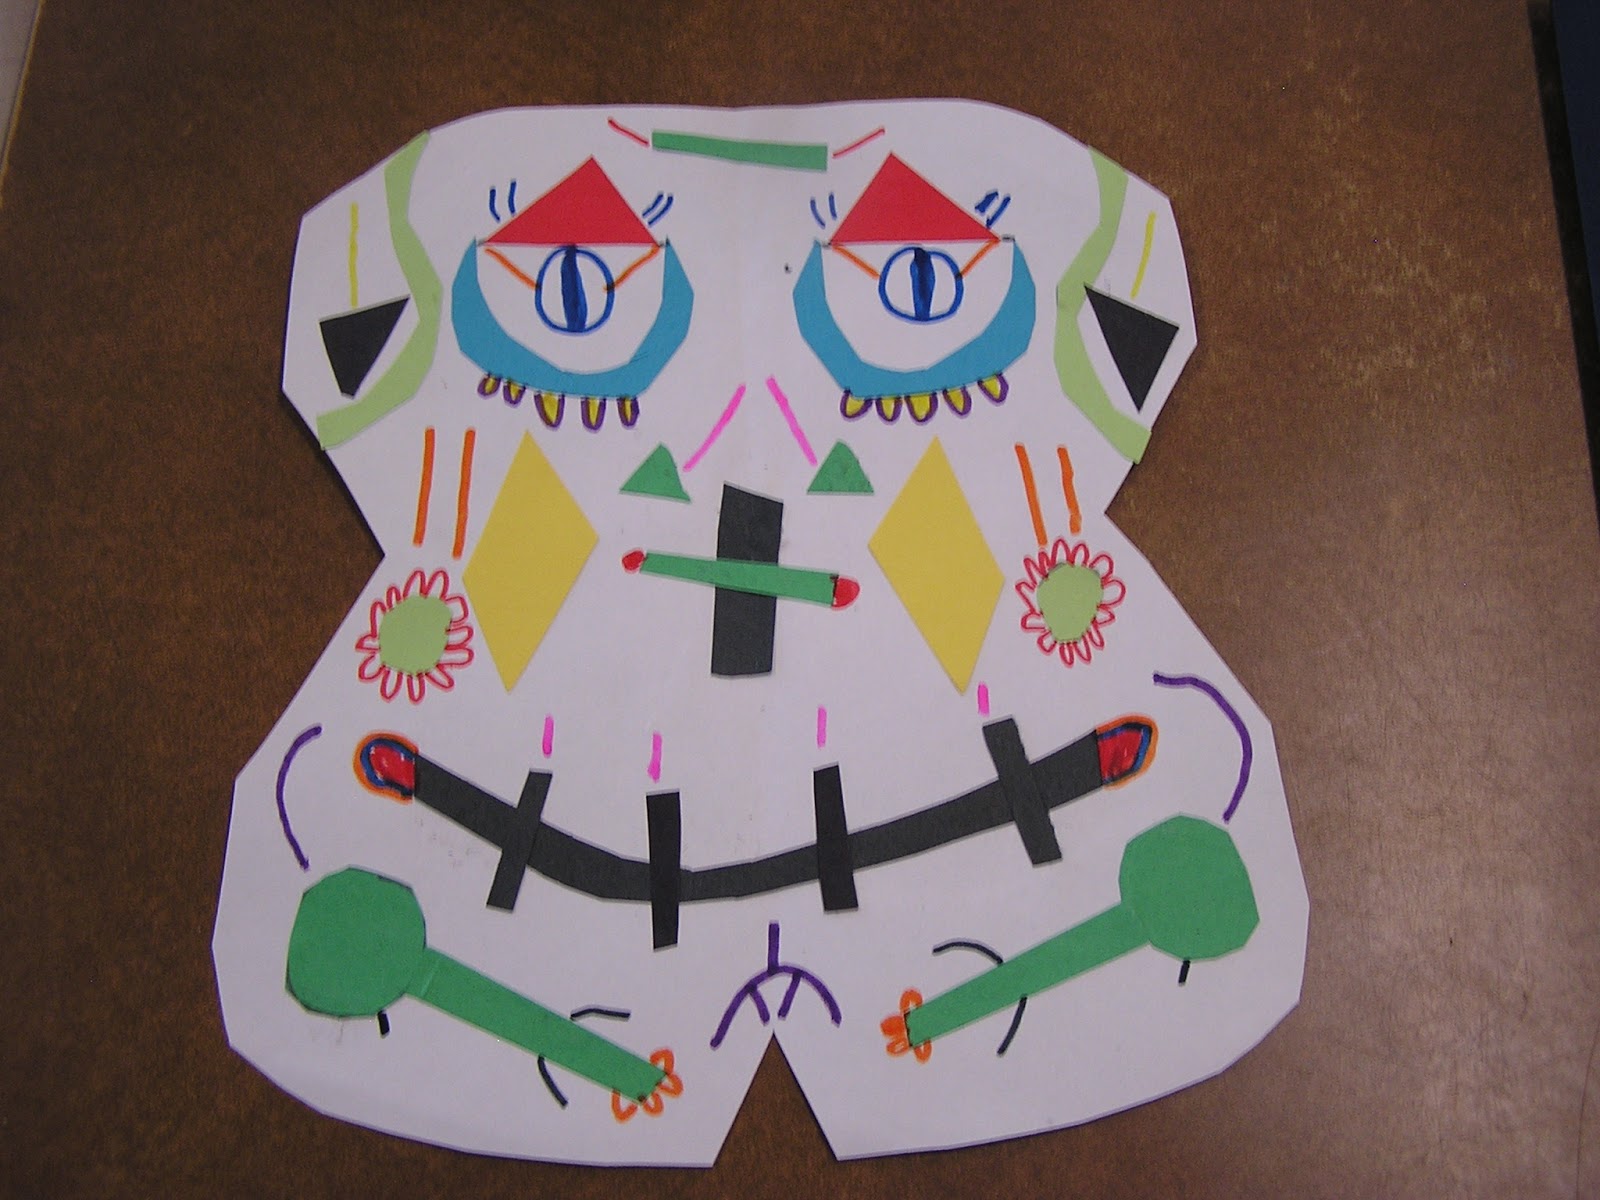
Symmetry Skeletons

        Symmetry Skeletons     

    Halloween lends itself to a lesson on symmetry very well.  The lessons of symmetry have been in Math books from 1st grade.  I use this with my 5th graders. So a short bit of review may be necessary for some vocabulary terms. When you show the kiddos that they are going to be designing skeleton heads, they are ready and willing to work.

 Today I am linking up with Forever in Fifth Grade for the October Show and Tell Tuesday.
www.foreverinfifthgrade.blogspot.com


    First folding the paper is necessary to form the head shape.  The fold can then be used as the mid line for the correct placement of the facial features and extra designs. Markers, crayons, and some scrap paper and glue is all the students need to complete this project.
 

      This lesson can be related to Dia de Los Muertos   or  Day of the Dead which occurs on November 1st and 2nd. 


 As you can see, each student has their own impression of how each skeleton should look.


I hope you have a wonderful 
Halloween  this year.


Please leave a comment. I'd love to hear from you.

Beti

Sunday, August 30, 2020

Black Cat Finger Puppets

     Black cats are so much fun at Halloween!  So I decided to make a set for my granddaughter 's preschool class.

     These little guys are about two inches tall made from scraps of black felt and embroidery floss.   Tiny seed needs were seen in the face for the eyes andnose.  A few simple straight stiches were seen for the mouth and whiskers.


     Each black 🐱 has his or her own personality.  All my finger puppets are cut free hand.  So everyone is a little different.   Now, if you are a pattern person, draw your pattern and work from it.

     I find that preschool children love to play with finger puppets and make them talk, sing, dance, and play.

I hope you find these little friends an enjoyable experience for you and your children.
 Happy Sewing!

Beti

Saturday, October 8, 2016

Minion Costumes

          This summer I was crocheting baby hats for my two new granddaughters.  I made several yellow ones.  "They could be made into minion hats", was a thought that crossed my mind.  My daughter asked if I could made one for a Halloween costume for her daughter.  Of course I can't resist a crafting challenge.
    Here is the minion hat I made.


        My little granddaughter has blue denim overalls to go with the hat.  

      A costume for the dog, Barkley, a Yorkie was also requested.   When they came to Michigan last Christmas, I made Barkley a little green felt coat to wear outside.  So I knew I could made him a minion costume.  It has velcro so it can be secured around his neck.


           This is not Barkley.  I don't know if he could stand still long enough to have this picture taken. I used an old  stuffed animal for fitting of the minion costume for size.
         

Wishing everyone best wishes for your  Happy Halloween shopping.
  Beti

    Please leave a short note if you have a minute.  I'd love to read your thoughts, ideas, and suggestions.