Showing posts with label Freebie Friday. Show all posts

Thursday, October 29, 2020

Day of the Dead

Silly Skeletons          
for 
Day of the Dead


          Each year my 5th graders have a Dia de los Muertos or Day of the Dead celebration as close to Nov. 1 and Nov. 2 as possible.    The students pick a person whose life they would like to celebrate.     The families talk about the aspect of their life and what the person looked like.      I have the students complete a research sheet to have all the details in one place. 

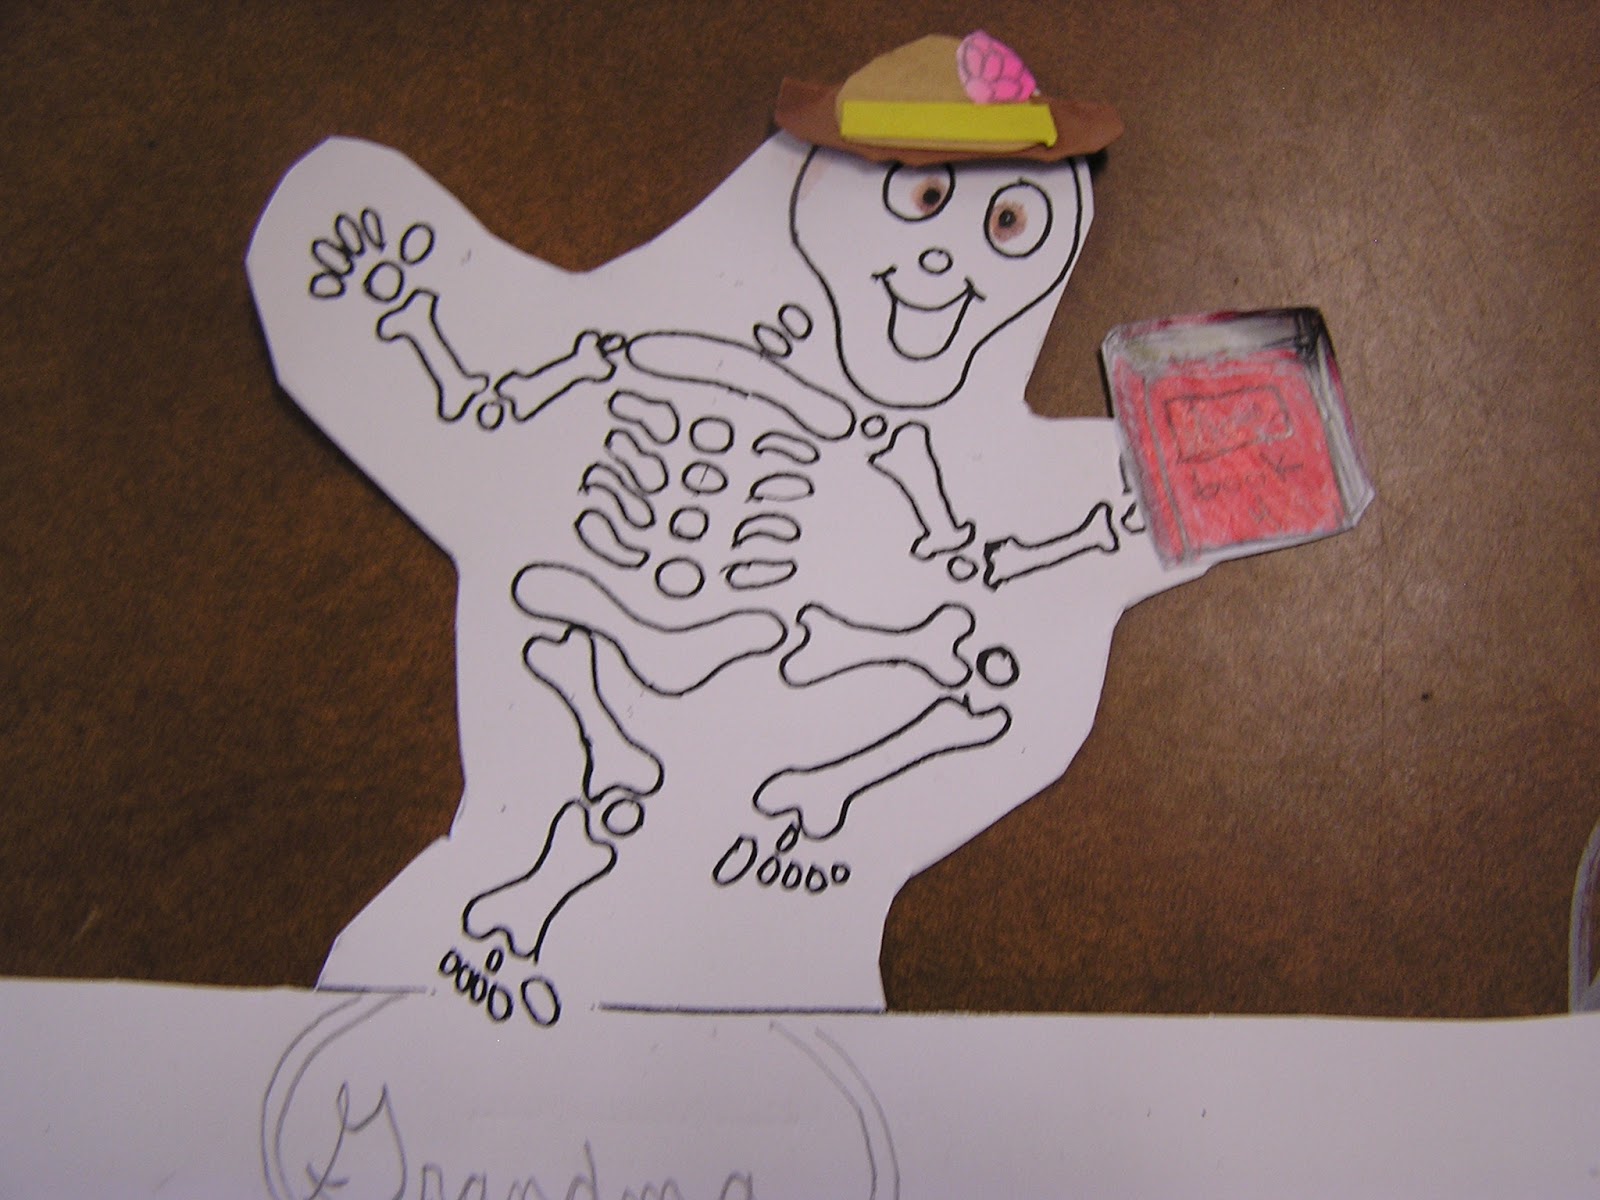
        We make little paper stand up skeletons for each person's life that we celebrate.    The instructions were to give the person a silly hat to wear and something that they liked, such as a favorite food or candy, in their hand.    You can see that the students had talked to their parents and knew about each person.


I am linking up with Doodle Bugs Teaching for the 
Five for Friday Linky Party -


     The students bring in a shoe box to make a small altar for the celebration.
A picture, candle, flower, and decorations are placed on a small piece of cloth used as an altar cloth. 

     Each child has a turn to speak about their person.     I encourage them to tell a funny story about this person.    This takes their minds off the fact that the person has passed on before us.

          This year I worked with the Art teacher to have the students make skeleton masks or sugar skulls.     In Mexico and Mexican neighborhoods in the United States, small and large skulls are made out of sugar for the Dia de los Muertos celebration.     It was a great lesson in symmetry.      Here are some examples of their sugar skulls.     The students used construction paper, crayons, and markers.


Please leave a message or comment if you get a chance.
Enjoy the beautiful day!

I have linked up with Teaching blog Addict for Freebie Friday.
Check out all the great ideas this week. 

www.teachingblogaddict.blogspot.com 

It's never too early to prepare for our Halloween activities.
Happy Halloween to all!

Beti 

Friday, August 25, 2017

Helpers

 Kids love to help in and around the classroom.   

  Most teachers have a helper chart of some kind in their room.
 I have my kids made little people to resemble themselves.

Today I am linking up with Doodle Bugs Teaching and the Five for Friday Linky Party! Lots of great ideas all around.
www.doodlebugsteaching.blogspot.com 


       The tag at the bottom is for the student's name.

Here are a few examples of this year's helpers.  After the designs are completed, I laminate the helpers and cut them out.


         I am so pleased that the children take so much time and add details to the characterization of themselves. At the beginning of the year we are just getting to know our students. By observing student artwork, the teacher can learn so much about their students. Our students wear a uniform to school, so they really enjoy wearing everyday clothes to school on special days.

        Here are some of the helper tags.  The students attach their helper person near the tag of the job they have chosen. 


    What type of Helper Chart do you have in our room?

     Please leave a comment.  I always enjoy hearing your thoughts and ideas.

Have a great  2016 - 2017 school year!

Beti

Saturday, November 14, 2015

Early Exploration Flip Chart

                      This is the time of year my 5th graders learn about early exploration of Europeans.     We started our unit by drawing a 1400's sailing ship.  You can read about this in my last blog post.


       We discussed the reasons for exploration, read a few pages in out text book, and took notes.  A flip chart is a more visual way for my students to get a better grip on the information presented.  I did find this type of project on Pinterest, so I can not take credit for thinking it up myself. Some other amazing teacher had the idea first!
Motivation, Obstacles, and Achievements


      This is the information I guided my students to add under each flap.  I say "guided" because  I draw each illustration, one at a time,  in the correct location so the kiddos have an idea what to draw.  If I left it up to their imagination, Lord only knows what they would have inside their flip chart.


    I always tell my students, "A picture is worth a thousand words" when you are studying.  I know some people might think that coloring is for the primary grades and busy work.  I say, "NO!"  When my students take their time to complete their work in color, they are spending additional time on the material, thus more time studying.  Color stimulates the brain.  I say, "Let them color", not on coloring pages to fill up excess time, but work with purpose.

Here are some examples of student work. 

This student wrote the definitions on the front cover of the flaps.


Love the giant sea monster!

Another purple sea monster!


                        www.teachingblogaddict.blogspot.com

Please check out all the great freebies at FREEBIE FRIDAY with this link.


I hope this post was beneficial in some way for use in someone's class.   


 Please leave a comment if have have a spare moment in your busy day. Enjoy the fall weather!

Tuesday, November 10, 2015

Plymouth Colony Flip Chart

             I love to make flip charts with my 5th graders.
The Great thing is they love it too!

     So, when we are working on the Pilgrims and Plymouth, my kiddos work on a Plymouth Colony flip chart.


        This is a shot of the outside flaps of the flip chart.  I always have my students glue their flip charts on to loose leaf paper.  The the flip chart can be stored in their subject duo-tang.  It won't get lost and can be used whenever necessary. 
        The chart is glued under the narrow section on the left side.  Next the kiddos cut along the black lines to make the flaps.


          On the loose leaf lines, the children write bullet points to list any important information. 


            After my 5th graders have written their information, they discuss with their neighbors any additional information that should be added to make the flip chart more complete.  Discussing and sharing information is a huge part of learning in my classes.  The kiddos learn so much from each other during this part of class.  By reading another child's work and telling them what you think solidifies knowledge of the material.
       Another step is to have the kids go home and teach their parents what they have learned.  The parents are pleasantly surprised how much knowledge their child has.  Hopefully, the parents learn some history, too.
       Lastly, we used these flip charts to review before a test or quiz.  They make a great base for "Do you know...?" "Yes, I do know..." review sessions.
I blogged about this technique on October 11, 2015.  Check it out if you get the chance.


I hope another 5th grade class can use this idea in their unit of study on Plymouth Colony.

Please leave a short comment if you get a chance.

Enjoy the beautiful month of November.


This post is linked to Teaching blog addict.  Go check out all the great ideas this week!
www.teachingblogaddict.blogspot.com 

Saturday, October 3, 2015

Cursive Handwriting Practice

       Teaching in a Catholic school, we still believe in teaching cursive handwriting.  This is not a lost art.  We still need to read the written word.  There are a multitude of historical documents that need to be presented to the youth of today and in the future.  How will our descendants be able to read any personal notes or letters from people in their past?  How will children of the future be able to appreciate our country's historical documents, the Declaration of Independence, the Constitution, or the Bill of Rights if they can not read cursive handwriting?  What a shame for this to happen!
   So, as a 5th grade teacher, I give my students meaningful cursive handwriting practice.  Twice a week, I write, in my BEST cursive handwriting, a paragraph pertaining to a lesson that was given that week.  I have been incorporating my Religion lessons. The students copy the information on the bottom portion of the page.  
    We use a S+ , S, and N scale to access handwriting.
Here are some examples of student work this year.


      As you can see, my students are at various stages of cursive handwriting proficiency.  As we know, cursive handwriting takes great eye - hand coordination and concentration.   Handwriting is always a work in progress.  It takes practice.
     I do think cursive handwriting is well worth the effort.  It should not be a dying art.

Do you teaching Cursive handwriting in your class?

Please leave a comment if you get the chance.  I enjoy hearing from you.
Enjoy the cooler October weather.

        Hop on over to teachingblogaddict.com to see all the other freebies in this week's collection, Oct. 2, 2015.  Here is the link:
teachingblogaddict.com


Beti